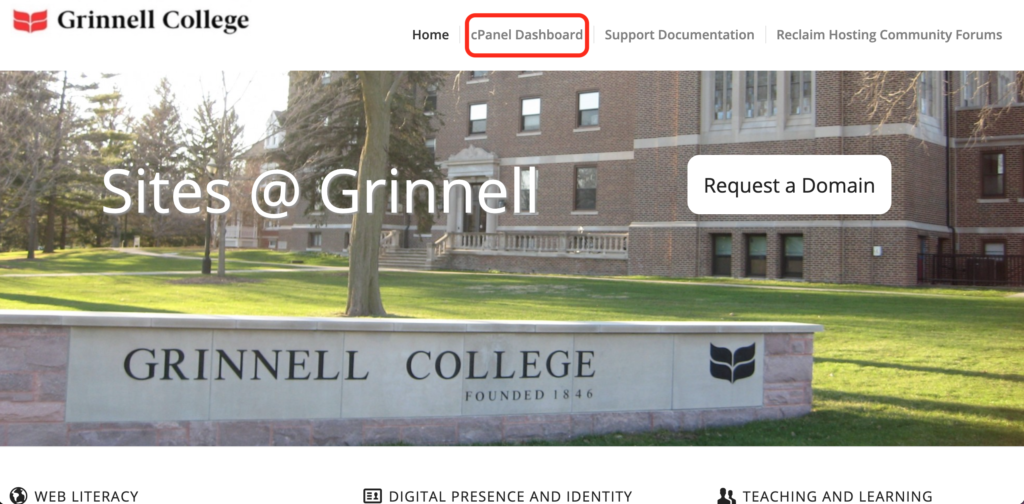
- Log into your cPanel:
- Navigate to Files > All Applications:

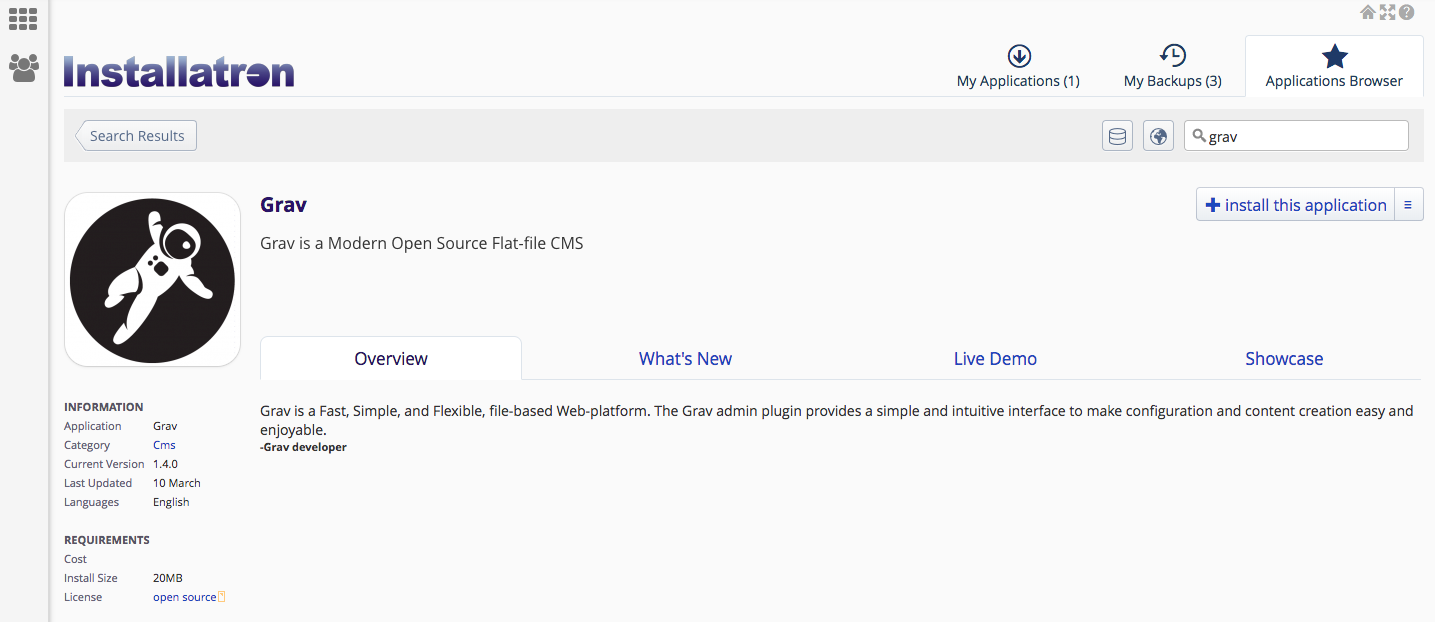
- Type Grav in the top right search bar and press Enter. Click Install this Application.
- Choose where you would like the domain to live. If you need further assistance on this section, read through our guide on Subdomains Vs. Subdirectories. You’ll also want to choose the latest software version, accept the license agreement, and choose your update preferences.

- Scroll down. Choose your Backup preferences. In the Settings section, name your Grav install, type in your contact details and create a username & password. Make sure that you’ve copied and pasted these credentials elsewhere, as you’ll need them later.

- Scroll down. Here you’ll have the option to install an empty version of the tool (i.e. a blank slate) or you can install a predefined package with themes/settings already customized for you. You’ll still be able to change settings in a predefined package, but it at least gives you a starting point. When you’re ready, click Install.

- You’ll now be redirected to a window where Grav will install.

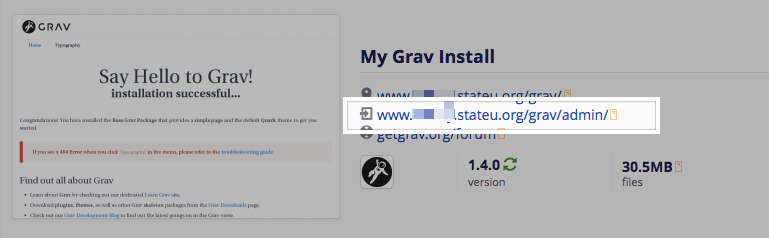
- Once the install has completed, click on the middle admin link to log into your new Grav instance:
- Type the credentials that you set during the install process, and click Login.

